This tutorial shows you how to create custom mappings tailored to your file structure while remaining compatible with two global mapping standards:
- Transactions (formerly
Unconsolidated Payment Files) - These files contain individual transaction records (e.g.,SAP REGUHextract). Each row represents a single payment to a bank account. This approach is preferred because it offers greater precision and flexibility. - Consolidated Accounts (formerly
Consolidated Payment Files) - These files are aggregated at the bank account level and summarize payment relationships. While still useful, consolidated files require specific preparation steps to ensure compatibility.
What does this feature enable?
You can securely upload either an unconsolidated payment extract (e.g., SAP REGUH file) or a consolidated payment summary into your private Bank Account Storage within CDQ Cloud Apps. This makes the process more user-friendly and adaptable to your needs.
Why is this important?
The primary goal of this upload is to help your organization protect against payment fraud. By storing, structuring, and analyzing outgoing payment transactions, CDQ’s Fraud Prevention Services, including the Trust Score, enable you to assess the bank accounts you pay and reduce the risk of sending money to fraudulent accounts.
Learning Goals
In this tutorial, you will learn how to:
- Create a custom Data Transformation Definition (DTD) in Bank Account Data Mirror,
- Use your custom DTD during the Bank Account Data Import process.
- Validate the imported data against your DTD.
Before you begin, ensure you have necessary access and roles.
Access to CDQ Cloud Apps
Check your CDQ apps account.
- Log into the CDQ Cloud Apps
 |
No account?
- If your organization is already a CDQ customer, ask your internal point of contact to create a CDQ dedicated account or request account. Account detail will be sent by email.
- If your organization is not yet a CDQ customer, please contact us to get started.
Necessary roles
Ensure your account has one of these roles:
- Data Mirror App User
- Data Mirror App Manager
To create a Data Transformation Definition (DTD), follow these steps:
- Navigate to the Data Mirror Management app,
- Select Bank Account Data Mirror tab,
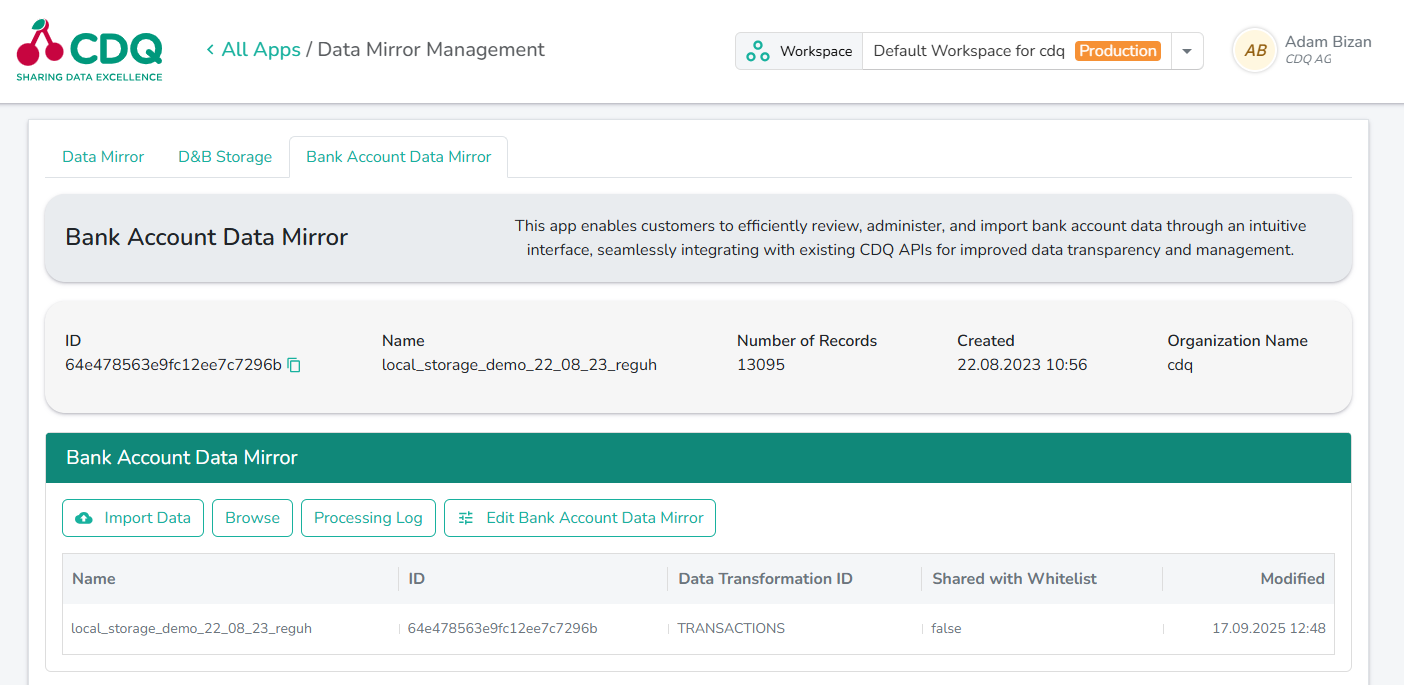 |
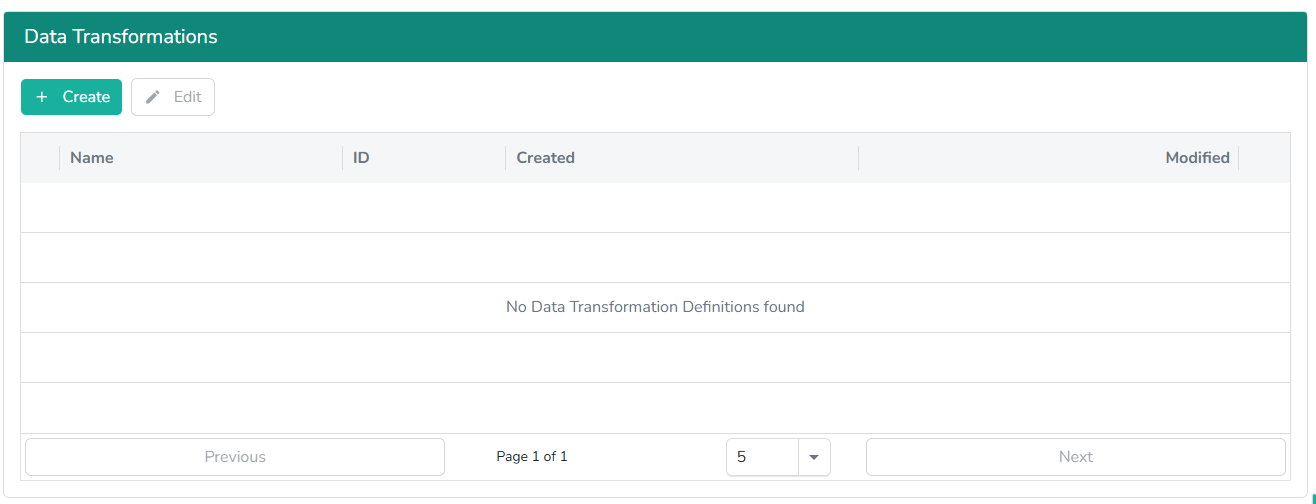
- Scroll down to the Data Transformations table,
- Select Create button.
 |
Define your DTD by following these steps:
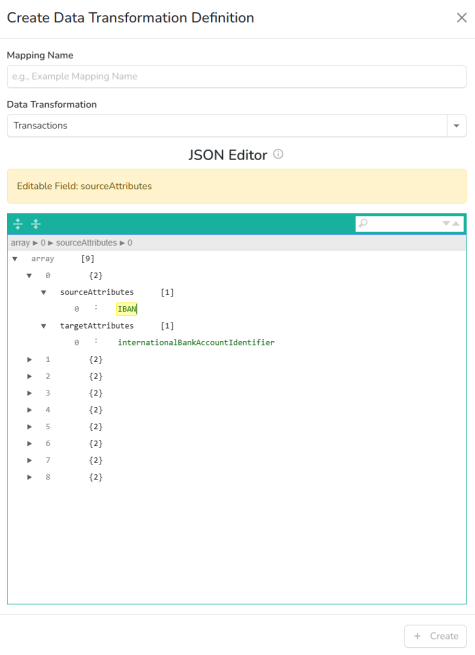
- Enter a Mapping Name for new Data Transformation Definition,
- Select global mapping standard in the Data Transformation field, in this case
Transactions,
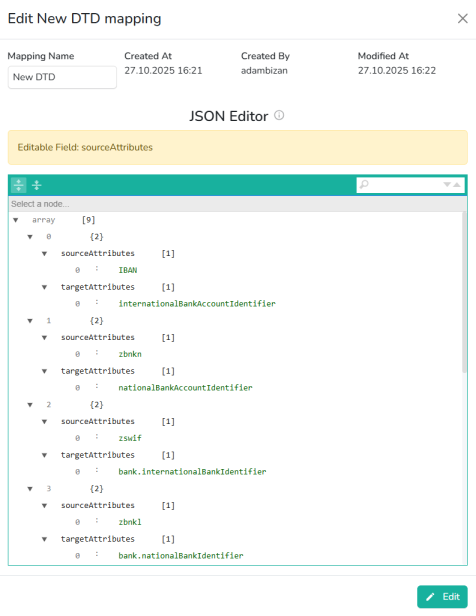
After selection of the Data Transformation, a JSON Editor will appear.
- Edit the
sourceAttributessection to match column names in your file,
Only sourceAttributes is editable.
- Edit
sourceAttributeswhich should reflect column name in your file, for example:IBAN,
 |
- Click Create to Save,
- Check your Data Transformation Definition in the Data Transformations Table,
- To modify an existing Data Transformation Definition, select it and click Edit button.
 |
To start the Bank Account Data Import Process, follow these steps:
- Scroll to the Import Data section in the Bank Account Data Mirror table,
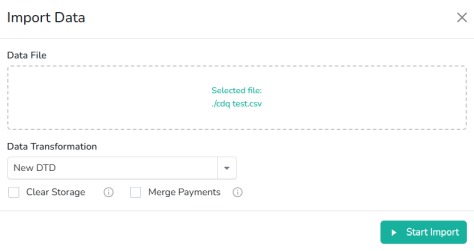
- Click Import Data button,
- Drag and drop your file or select it using Choose file,
- Select the Data Transformation Definition you created earlier,
Before you start the import, ensure that your file is properly formatted and contains all required fields. Read the How to upload your payment file tutorial for more information.
- Click Start Import,
 |
- Check the import status in the Bank Account Data Mirror table.
You have created a custom Data Transformation Definition and used it to import your bank account data into Bank Account Data Mirror.
We are constantly working on providing an outstanding user experience with our products. Please share your opinion about this tutorial!